Introduction
AWS has excellent infrastructure for building highly available and scalable applications. The infrastructure consists of Regions, which are physical locations around the world from which the services are provided, currently 12 of them. Within regions, there are multiple Availability Zones (AZs) which are clusters of datacenters connected with a high speed and low latency network. Read more about Regions and Availability Zones over at the AWS web site.
The first step in building highly available is to deploy your applications into multiple Availability Zones. EC2 instances can be deployed to different AZs within a Region, Elastic Load Balancers can be used to distribute traffic between them. It can even discover broken instances and stop directing traffic to them. To take this a step further you can use Auto Scaling Groups which can span multiple AZs and have them scale out your application, or replace broken instances – all automatically. RDS can also be deployed to multi-AZs with the click of a button or two. Or was it three? I don’t remember.
Multi-AZs will give you highly available applications and will cover the majority of the cases but what about if you need to take this to the next level and be able to fail over your application to a different region? Let’s look at how this can be accomplished and it’s actually quite easy.
The building blocks
In our example we will setup WordPress on EC2 instances in two different regions. One region will function as primary and the other one will take over in case of failure. The database will be hosted on RDS running MySQL which supports cross-region read replicas – basically an asynchronous replication of your primary RDS instance to another region. Route 53 will be used to point the traffic to your primary region, check the application health and failover to the secondary region in case a failure is detected. Here is a simple diagram over the solution.
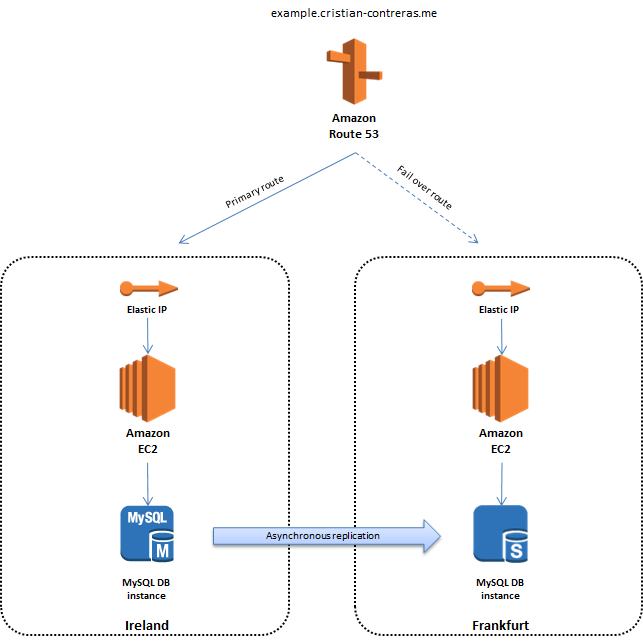
Route 53
Route 53 sits on top and points the DNS name example.cristian-contreras.me to the Ireland Region in this example. It will also poll the application to check its health. In case a failure is detected, it will automatically switch the traffic to the Frankfurt Region.
Elastic IP
An Elastic IP will be assigned to each EC2 instance. This gives static public IPs as opposed to dynamic public IPs which are default. We want the EC2 instances to keep the same IP even after a shutdown.
EC2 instances
The EC2 instances are the web servers in this case and will have WordPress installed on them. Simply because it’s easy to install and illustrates the example well. You would normally deploy at least two EC2 instnces behind an ELB, one in each AZ but I’m sticking with one for simplicity.
RDS
RDS hosts the WordPress database on MySQL with a read replica to the Frankfurt region. Normally you would probably do a multi-AZ deployment for a production workload but again, this example is about regional high availability.
Setting this up
Setting this up consists of a few steps. Setting up the database, setting up the web servers, assigning Elastic IPs and configuring Route 53. Let’s get started.
Setting up the database
Launch the AWS Console and point it to your primary region, go into RDS and launch an instance. Make sure to choose MySQL as this supports cross-region read replicas which we will use to get the database to another region.
Bellow you see how I’m configuring my instance. I’m using a db.t2.micro instances, no multi-AZ deployment and just 5 GB of disk. The DB Instance Identifier is the name you want to give your instance. I’m using “wordpress-ireland” as that will quickly tells me that this is my WordPress instance in Ireland. The Master Username and Password are the credentials to your database instance. Take a note of theese values as you will need them later!
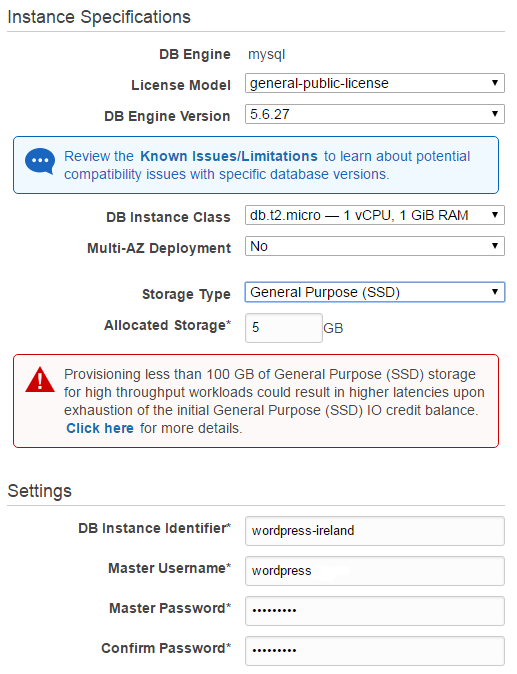
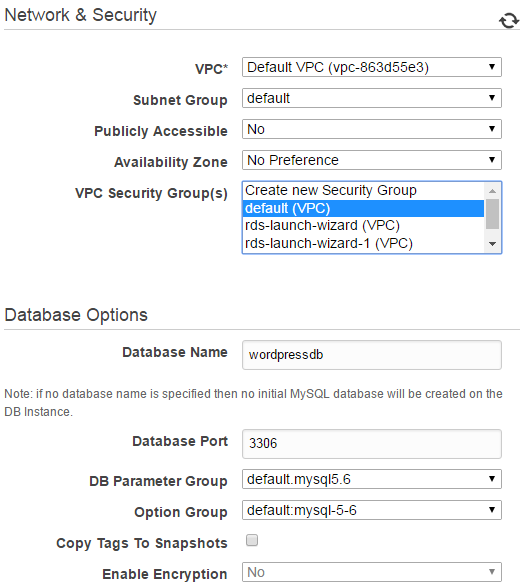
Next are the advanced settings. I’m deploying this to my default VPC, not publicly accessable and putting it in my default VPC security group. In a real world scenario you may want a dedicated security group for the RDS instance and only allow traffic on port 3306 from the security group containing your EC2. Make sure to also specify a database name, I’m using “wordpressdb”.
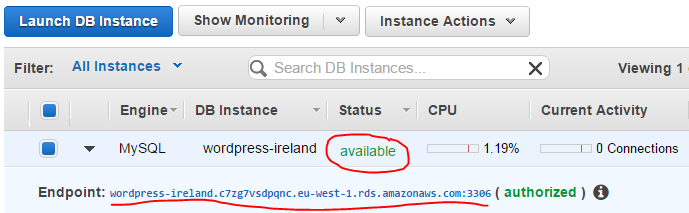
Next, click Launch DB Instance to get things going. This will take a few minutes. Go grab a coffee or just roll your thumbs. Once your instance is ready for use it will say status available. It will also give you the endpoint adress for connecting to your instance. Make sure to take a note as you will need this later.
To create your read replica, let’s go into Instance Actions and choose, well you guessed it, Create Read Replica.
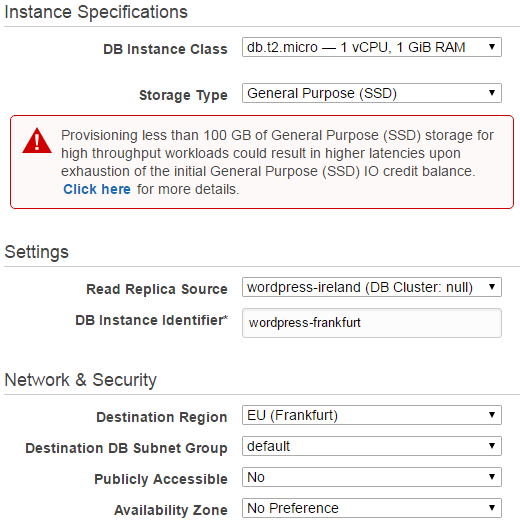
Here, I give the it the name “wordpress-frankfurt” and choose Frankfurt as the Destination Region. Again no public IP and a db.t2.micro. Click the button to create the read replica.
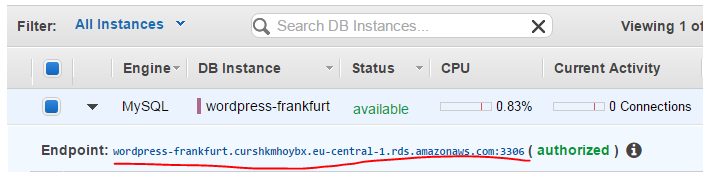
Now switch the console over to your secondary Region, in my case Frankfurt and check the status of your RDS instance. After a few minutes, it should become available and give you an address to the endpoint of your read replica. Take a note!
Now we have the database part running with replication to our secondary region.
Set up the web server
Now that we have the database up and running, lets install Wordpress. I’m using Amazon Linux and have used the following guide. Bellow is the short version of the procedure.
Go to your primary Region and launch an Amazon Linux EC2 instance. I’m using a t2.micro. Make sure you deploy it to a public subnet so it can be accessed from the internet. Also, make sure the security group you use will allow http traffic from the internet. Login, and run the following commands.
Install Apache web server
Let’s start by installing Apache.
sudo yum install -y httpd php php-mysqlnd
Make sure that the web servers starts automatically in the future start it manually for this time.
sudo chkconfig httpd on
sudo service httpd start
Add a www group and make yourself member of it to have write access to the Apache document root.
sudo groupadd www
sudo usermod -a -G www ec2-user
Now log out and login again to have the group membership take effect and set file permissions on the Apache document root.
sudo chown -R root:www /var/www
sudo chmod 2775 /var/www
find /var/www -type d -exec sudo chmod 2775 {} \;
find /var/www -type f -exec sudo chmod 0664 {} \;
Install WordPress
Now that we have Apache up and running. Let’s get on with the WordPress installation. Download wordpress:
wget https://wordpress.org/latest.tar.gz
tar -xzf latest.tar.gz
Create your WordPress configuration file:
cd wordpress/
cp wp-config-sample.php wp-config.php
nano wp-config.php
Edit your newly created configuration file:
nano wp-config.php
Find the lines bellow and replace the values in red with your values. You did take notes in the previous section? Here is how my file looks like, apart from the password which I’m keeping to myself. Note that DB_HOST should point to your RDS endpoint in the same region as your EC2 instance.
define('DB_NAME', 'wordpressdb');
define('DB_USER', 'wordpress');
define('DB_PASSWORD', 'password_here');
define('DB_HOST', 'wordpress-ireland.c7zg7vsdpqnc.eu-west-1.rds.amazonaws.com:3306');
WordPress uses some salt and key values to provide a layer of encryption to the browser cookies that WordPress users store on their local machines. Get your own by visiting the WordPress API that randomly generates them for you. Replace the examples in the configuration file with your own. Here is an example:
define('AUTH_KEY', 'o2XCCOwAd)|e}-Qu7E#09qjgw>U|a d|OszfpJRR7w*6V^W=_EF6n$1_DMB28jiz');
define('SECURE_AUTH_KEY', 'u% <{-&_&7StJ=|,2XRNSv4&84IM&nS.l3|q]!J~C^zyQRW?hFUn^hTSdez8?y+%');
define('LOGGED_IN_KEY', 'Nuopj*?pb-=RqHJ35PvqpVB.eoO1:0FxvS xI70L}13y.bDooofB65>o 4vJt|?b');
define('NONCE_KEY', 'W;9--%,ULc(c9g~h+g&|_QtS%g[y|5{_(t|ED:8~e_Gzi!Lz `D_ew|,|,R8w=f-');
define('AUTH_SALT', 'XS-4fOEo],i#`<*qn%xmcf]$ );r+[o)-`75OU[@q@.#fI+2-zb(.m5{LcE*Dr(;');
define('SECURE_AUTH_SALT', '2|^-W{Za]BmBj/^/;-$#Mg81wS|m#s+HpTQ9#fJ+`7.))@g;<G<s2O>fe0F2Mngj');
define('LOGGED_IN_SALT', '>r]-W1Gl|uV9y+DkbC-!:f9mnnU3mr mS CoReKkA+:1L[3CV^-rl]$5ZVk1L1=q');
define('NONCE_SALT', 'm&yP/tYKHk}jxr$]r@Dpj_kEalfn>D&e#%YSy2#-Z=.h$|}9+}|Qk8!6L-RiUKN3');
Now, move the wordpress files to the Apache document root. If this step is not working, you probably missed to logout and log back in when assigning yourself to the www group.
mv * /var/www/html/
WordPress permalinks need to use Apache .htaccess files to work properly, but this is not enabled by default on Amazon Linux.
sudo vim /etc/httpd/conf/httpd.conf
Find the following section in your file and replace AllowOveride with All.
<Directory "/var/www/html">
    # some stuff here...
    AllowOverride All
    # other stuff here...
</Directory>
Some of the available features in WordPress require write access to the Apache document root (such as uploading media though the Administration screens).
sudo usermod -a -G www apache
sudo chown -R apache /var/www
sudo chgrp -R www /var/www
find /var/www -type d -exec sudo chmod 2775 {} \;
find /var/www -type f -exec sudo chmod 0664 {} \;
Let’s give Apache a restart to pick up the new group and permissions
sudo service httpd restart
Assign Elastic IPs
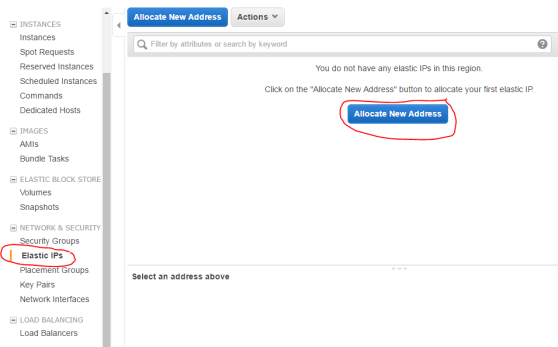
Give the server an Elastic IP. This is a public static IP that won’t change if we shutdown the server. We need this.
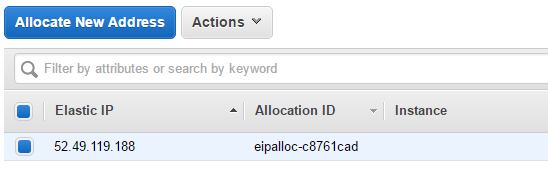
You should now see your Elastic IP.
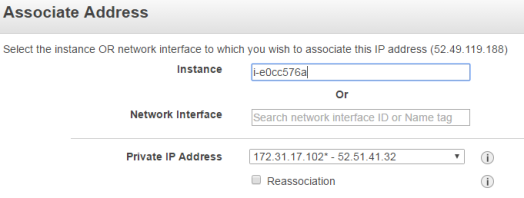
Under Actions click Assosiate Address and associate it with your WordPress instance.
That’s it for the EIP! Oh, by the way. Take a note of the IP.
Now repeat!
Don’t start WordPress just yet. First time it runs, it will look at the URL you are using and configure itself with that. Since we haven’t created our DNS record yet, we don’t want that to happen now. But we want a WordPress server in the secondary region So go back and repeat the section “Set up the web server” and “Assign Elastic IPs”. Only this time point your AWS Console to the secondary region and remember to point out the RDS endpoint in your secondary region in the WordPress configuration file.
Configure Route 53
Now we have almost everything up and running. Let’s set up Route 53 to point traffic to the application.
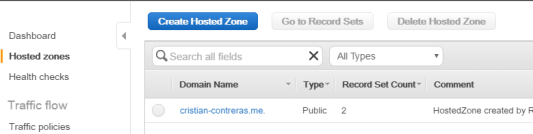
I have a hosted zone in Route 53. If you don’t have one, you can register one quite easily. Here is my zone.
Health check
First of all, let’s create a health check. It is used by Route 53 to determine if your application is healthy. If not, it will redirect the traffic to your secondary region.
Click Health checks in the Route 53 console and then Create health check. I gave mine the name wordpress. Specify the Elastic IP you assigned to EC2 in your primary region. Enter the hostname you will be using. I’m not creating an alert in the next step, just go ahead and create the healt check.
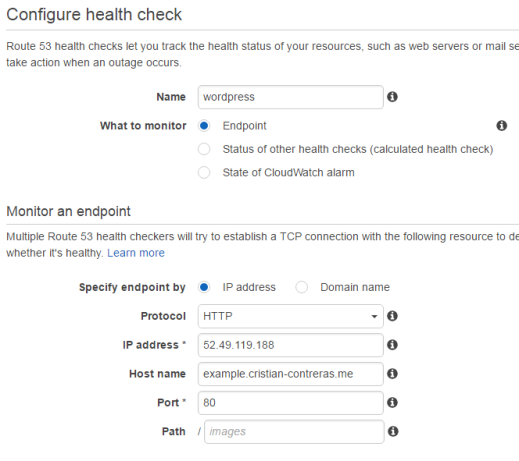
Within a few minutes it should go green.

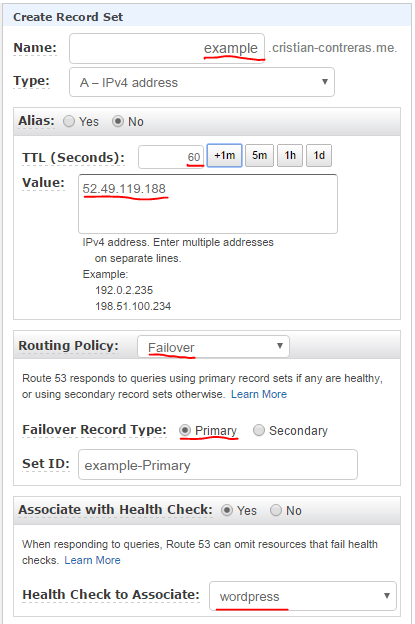
Primary DNS record
Now let’s go into our hosted zone and create a record for our primary region. Specify the name of the record, example in this example. I’m setting TTL to 60 sec to prevent DNS servers to cache the record any longer than that. Remember, we are failing over to the secondary by updating DNS. Set the Routing Policy to Failover, the Failover Record type to Primary and specify which health check to use.
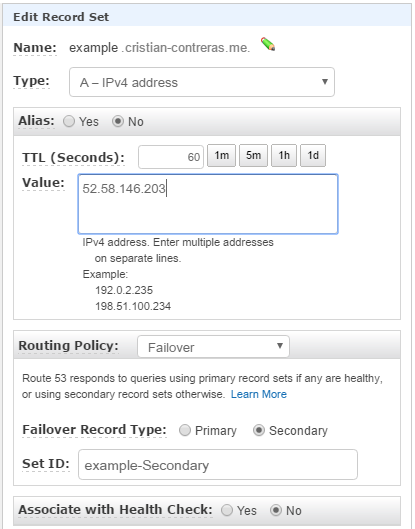
Secondary DNS record
Now we need to create our secondary record. This will point to the IP that we want to failover to in case the health check fails.
Similar to last time, only now specify the Elastic IP in your secondary region and set Failover Record Type to Secondary. No health check necessary.
That’s it!
Testing the magic
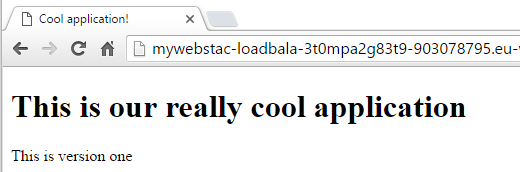
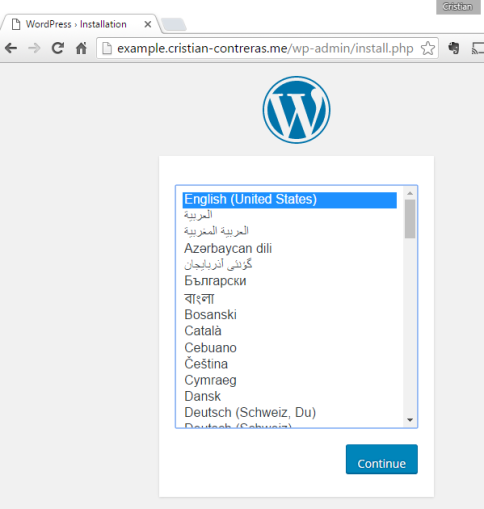
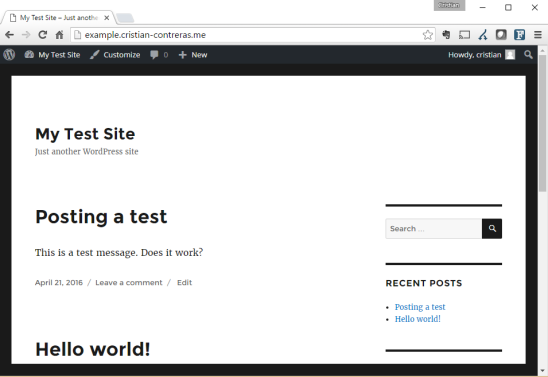
Now that we have everything set up, we are ready to test. Let’s go to our Wordpress URL. In my case it’s http://example.cristian-contreras.me. As this is the first time, it will take you to the WordPress installation guide.
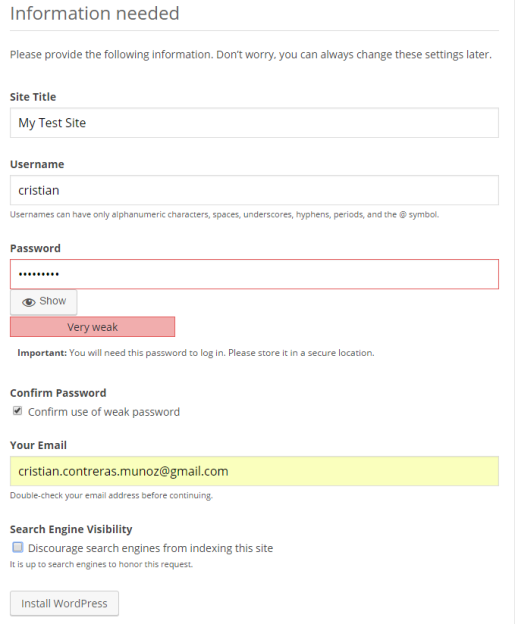
Next page asks you for Site Title, Username, password, etc. Complete the form and click Install WordPress to have the blog installed.
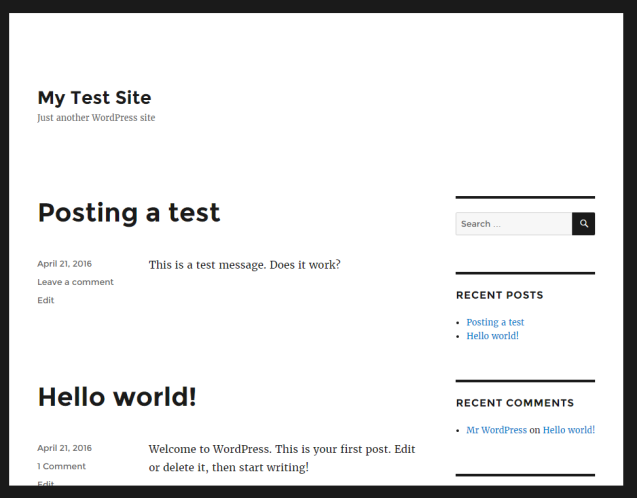
I post a test message and the blog looks surpringsingly similar to this one. Our WordPress site is working!
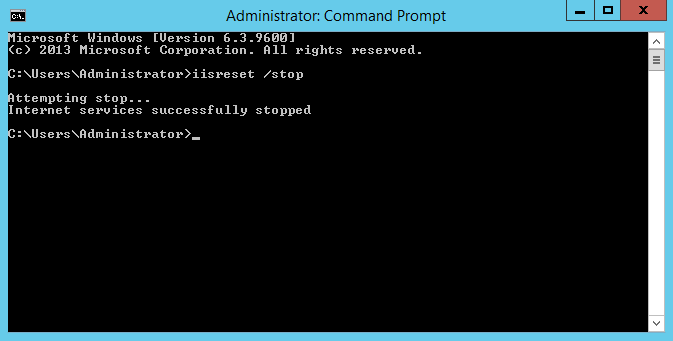
Let’s break things
If this works as expected, we should be able to stop the EC2 instance in our primary region and see a failover take place. Let’s see if that happens!
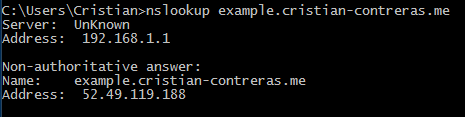
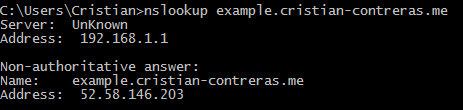
First of all, let’s have a look at where DNS is pointing. Looks right- that’s my EIP in the primary region.
Now we brutally stop the EC2 instance in our primary region.

Our health check reacts within a few minutes.

DNS now points to our secondary region.
Testing the site and it is working! Remember, our EC2 instance in the primary region is stopped so this is actually working.
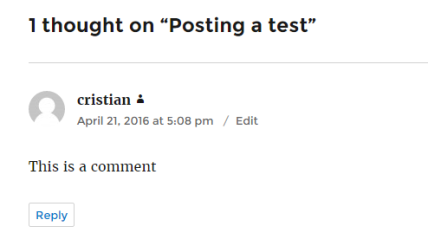
Yo can browse the site, no problem at all, but if we try to post a comment we get the following error. Remember, we are on a read replica in the secondary region so this is expected.

So we have failed over to our secondary region now, all automatically, apart from us deliberately breaking our application of course. This is pretty good even if our database is read-only. This might even cover our needs. In a major disaster scenario like this maybe we are ok with this. If not, let’s fail over our database.
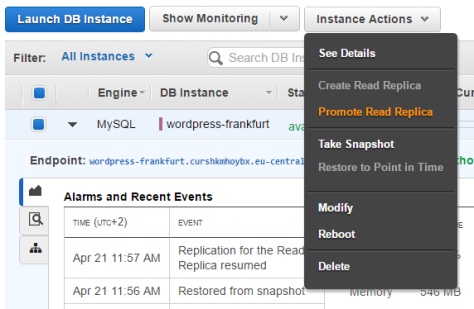
Promoting a read replica
Promoting a read replica is really easy. Just highlight it, click Instance Actions and choose Promote Read Replica from the menu and confirm the action on the following screen.
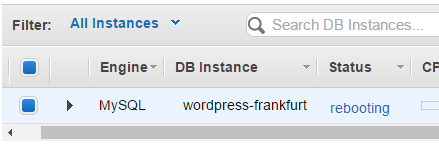
This will take a few minutes and the instance will even have to reboot.
Once the reboot completes I can post a comment and we are fully operational again.
The big gotcha
There is one important thing to be aware of. Since we promoted our read replica, it is now a stand alone instance. This means that we have two WordPress RDS instances living their seperate lifes, one in each region. If we would bring our web server back up in the primary region, Route 53 would point us there and we would be talking to the primary region again. Any changes made on the secondary region would be lost. This is not a problem, just something to be aware of and in other use cases desired behaviour. I’m sure there are clever ways of failing back but I would probably just terminate my original RDS instance in the primary region, create a read replica from the secondary region back to the primary and fail back in a planned way during off hours.
Also, WordPress stores uploaded media content locally on the server (i believe? ). Meaning that pictures we upload would never make it to our other region. Our applications should put uploaded files in S3 which does support cross region replication. There are actually WordPress plugins that does just that. Maybe a topic for an upcoming post.
Conclusion
So we have successfully failed over to our secondary region. If we are ok with read-only database, failover happens all automatically. Even fail back will accur once Route 53 sees that our application is healthy again in the primary region. It gets a little bit more complicated if we want to fail over the database but this is the nature of asynchronous replication. It requires some manual steps and takes a few minute to promote the read replica. You can of course automate things, AWS has excellent APIs. But is this acceptable or even useful? I say absolutely yes for both scenarios. Remember – running EC2 and RDS in multi AZ deployments protects you against datacenter wide outages and does it pretty well. This is the next level of protection, when not only a datacenter breaks down but a whole region. This is the kind of disaster that most of us, back in the days, would never have the resources to put in place and if it happened would put us in a really bad situation. With that perspective, this is amazing stuff!