Introduction
EBS volumes are designed for high durability. According to AWS, you should expect 1-2 failures during one year if you have 1.000 volumes running. So even if they are reliable, they are not unbreakable. Data should not be kept on EBS volumes – it should be stored on S3, RDS or similar. Logs should be shipped out from your instances to CloudWatch Logs or an logging platform you might be using. Regardless of this, we might end up in situations where we wish we could restore an EBS volume. It could be an update script that went wrong, accidental deletion or a volume actually breaking. This can be accomplished using snapshots. They are not application aware so they will not get your data out from your application in a consistent manner, but for typical application servers that does not contain your data they could do the job well. In this article we will look at how you can use AWS Lambda to create snapshots of your volumes automatically.
Since I wrote the article, the function has been improved. Check out the project on Github
Building blocks
The example is quite simple – we use Lambda to create a scheduled job that backs up your EBS volumes.
Lambda
At the heart of this example we have Lambda. It gives you the possibility to run serverless code. You don’t need to care about any servers – just upload your code and don’t worry about the rest. It also has the benefit of being very cost effective. You pay on 100ms intervals that your code is running. You can currently use Java, Node.js and Python. I’m using a simple Python example to take snapshots of our EC2 volumes.
CloudWatch Events
The backup job will be kicked off using a schedule event in CloudWatch Events. The events can be configured to run at specific intervals, example every hour, or att given times. I’m using the latter in the middle of the night when traffic is low.
Volume tags
Tags can be used to put your own metadata on your AWS resources. We will a tag to define which volumes we want to snapshot with this job. The tag I’m using is BackupEnable = True. So whenever new instances are created they can be included in the backup job just by tagging the volumes.
Python
The code is quite simple – it enumerates all the volumes, checks is if they have the tag BackupEnable = True, and if so takes a snapshot if it. Lambda has built in support for Boto 3, the AWS SDK for Python, which we use to interact with AWS.
Identity and access management
Lambda needs the appropriate permissions to do the work. This is accomplished using an IAM role that Lambda can assume. The role will have a policy attached to it that gives it the right permissions to do its things.
Setting it up
Identity and Access Management
Let’s start by creating an AIM policy that will give our backup job the permissions to do what it needs to do. Go into IAM in the Management Console, navigate to Policies and click ‘Create Policy’. In the next page, choose ‘Create Your Own Policy’. Give your Policy a name and paste the following policy document into it. It contains three sections. The first will give our Lambda job the permissions to log output to CloudWatch Logs. The next gives permissions to list and see information about the volumes like which volumes there are and if they contain our BackupEnable = True tag. The third section gives the permissions to take the actual snapshot.
{
 "Version": "2012-10-17",
 "Statement": [
 {
 "Effect": "Allow",
 "Action": [
 "logs:CreateLogGroup",
 "logs:CreateLogStream",
 "logs:PutLogEvents"
 ],
 "Resource": "arn:aws:logs:*:*:*"
 },
 {
 "Effect": "Allow",
 "Action": "ec2:Describe*",
 "Resource": "*"
 },
 {
 "Effect": "Allow",
 "Action": [
 "ec2:CreateSnapshot",
 "ec2:ModifySnapshotAttribute",
 "ec2:ResetSnapshotAttribute"
 ],
 "Resource": [
 "*"
 ]
 }
 ]
}
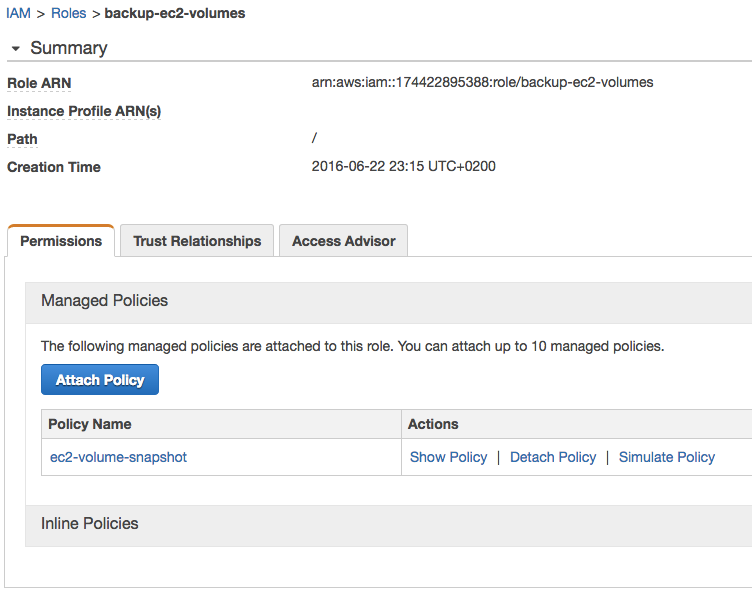
Next go into Roles and click ‘Create New Role’. Give your role a name. I call mine ‘backup-ec2-volumes’. On the next page, you have to choose role type. This will be a Lambda job so we choose AWS Lambda. Next you have to attach a policy to the role. Choose the policy we created in the previous step. Mine is called ‘ec2-volume-snapshot’.
Your role should look like this with the policy attached to it.
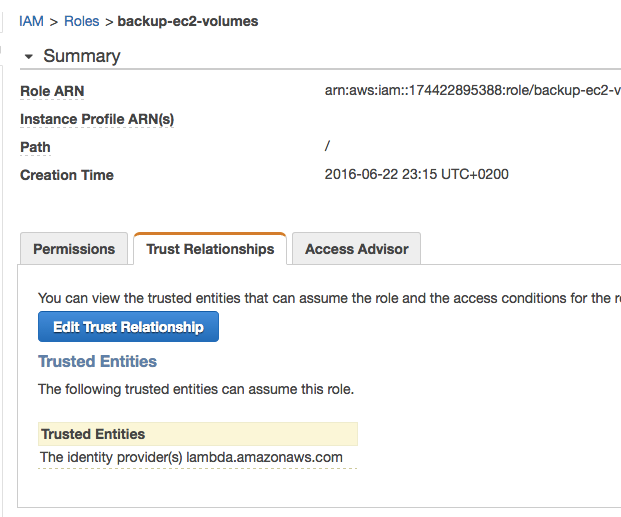
Lambda should be listed under trusted Entities. This gives the Lambda service permissions to assume the role.
Now that we have created a role, we can go head and create the actual Lambda job.
Lambda
Go to Lambda in the Management Console and choose ‘Create a Lambda function’. You will be presented a series of blueprints as a starting point, click ‘Skip’ and you will be taken to the configuration options on the next page.
Start by giving your function a name and choose Python 2.7 as your runtime. I call mine ‘backup-ec2-volumes’.

Paste the Python code bellow into the code window. It first defines a function called snap_volume that takes a snapshot of the volume that is passed to it as volume_id. The next function is the one that Lambda will call, lambda_handler. Here we put in our main code. It will list all volumes, iterate through them one by one and check if they contain a tag called BackupEnable = True. If so, call the snap_volume function and send along the volume_id. That’s it. The try-except is to catch situations where no tag is set. The print statements will end up as log rows – this is our way of logging what the job is doing.
from __future__ import print_function

from datetime import datetime, date
import boto3

print("Starting job at {}".format(datetime.now()))

def snap_volume(volume_id):
    ec2 = boto3.resource('ec2')
    volume = ec2.Volume(volume_id)
    snap_description = 'Snapshot of {0} {1}'.format(volume_id, date.today())
    volume.create_snapshot(DryRun=False, Description=snap_description)
    print('Snapshot taken of {} at {}'.format(volume_id, datetime.now()))
    return

def lambda_handler(event, context):
    client = boto3.client('ec2')
    response = client.describe_volumes()
    print('Volumes listed at {}'.format(datetime.now()))
    for volume in response['Volumes']:
        try:
            for tag in volume['Tags']:
            if tag['Key'] == 'BackupEnable' and tag['Value'] == 'True':
                snap_volume(volume['VolumeId'])
        except:
            print('No tag found on volume {}'.format(volume['VolumeId']))
Make sure you choose the role we created previously to give the Lambda job the right permissions. I’m happy with the rest of the settings so I just leave the defaults. No, you probably want to increase the timeout to 5 secs. I discovered that it takes around 2-3 secs for the AWS API to return a list of the volumes so the job might take more than 3 secs some times. Review on the next page and go ahead and create the function.

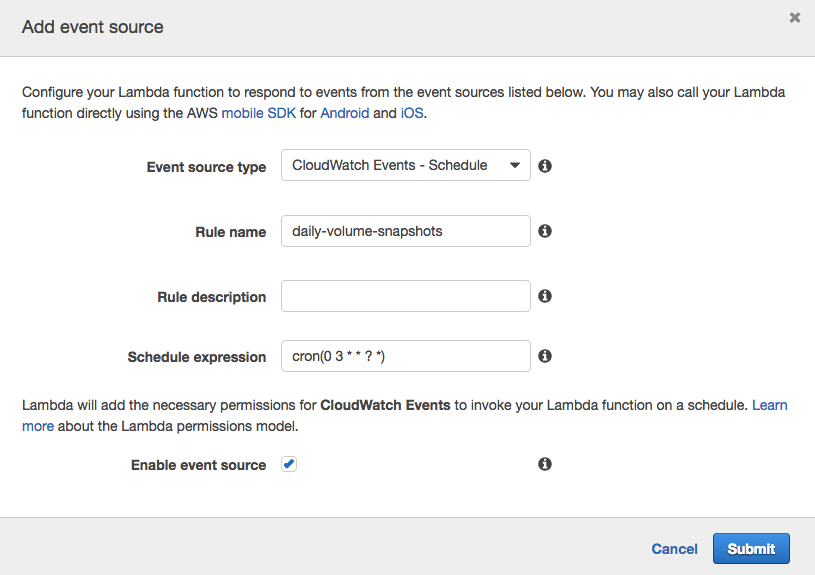
We will be taken to a page showing us our Lambda function. We still need to tell it how to trigger. We will use a CloudWatch Events Schedule to trigger this. Click ‘Event sources’ and then ‘Add event source’. You get a list of available event sources, choose CloudWatch Events – Schedule. Give your rule a name, mine is called ‘daily-volume-snapshots’. Give it a Schedule expression. The schedules are in UTC time. I’m running mine at 3:00 am every day. See AWS docs for more info about cron syntax. Go ahead and create the schedule.
Putting it to work
Now we have all the bits and pieces set up. Let’s go ahead and test our job. First we need to tag the volumes that we want to backup.
Tag volume
We have the job set up. Now we need to tell it which volumes to backup. We do this by tagging the volume with BackupEnable = True as shown bellow. That’s it.

Test the job
In order to test the job, just go into the Lambda function in the Management Console and click the test button. You will get log output similar to the one bellow. It shows execution time and the log output. Logs will also be output to CloudWatch Logs.

You should see your snapshot if you head over to EC2 and Snapshots.

Conclusion
It is quite simple to set up a Lambda job to create snapshots of your EBS volumes. Snapshots are incremental so only the changes from the last snapshot is saved. This gives you the possibility to take snapshots quite frequently without them becoming too large in size. They are not application aware so not suitable for volumes with frequently updated data unless you stop your application before taking the snapshot. They could be considered crash consistent, same result that you would get if you simply pulled the plug from the server. Anything that is cashed in memory will get lost but for many workloads this is no problem at all.


