Login to AWS using your Active Directory

Introduction

Many of us have an Active Directory and you might want to be able to login to the AWS Console using your Active Directory accounts. This can be done quite easily with the AWS’ Active Directory Connector. It has all the bits and pieces you need to get started and it’s quite inexpensive – around $40 per month at the time of writing for the small version which supports up to 500 users.

Building blocks

I’m assuming you already have an Active Directory in place. In this case I’ve set up an AD on EC2. The AD Connector will then act as a proxy to your AD. It also provides a login page that will authenticate against your AD. You will mapp AD groups (or users) to IAM roles.

Active Directory

I have created an Active Directory called cristian-contreras.local. For the purpose of this demo it sits on a single Domain Controller on an EC2 instance. It’s pretty much blank apart from the following:

  • User ‘Cristian’ which is my demo user that we will login to the AWS console with.
  • A group called ‘EC2ReadOnly’ that the user above is member of and is what we will map to an IAM role.
  • User called ‘DSConnectorService’ which is the user that the AD Connector service will use to connect to the AD. It does not require any special permissions, just a plain user.
ad-userscomputers
The only AD objects needed for this demo.

AWS AD Connector

The AD Connector is an AWS service that is probably best described by AWS’ own words:

AD Connector is a directory gateway with which you can redirect directory requests to your on-premises Microsoft Active Directory without caching any information in the cloud

It also makes it possible to map IAM roles to Active Directory groups (or users) and can even set up a login page for your AD users. Check out the documentation for more details about the service.

Setting it up

I’m assuming you already have an Active Directory. Let’s start with setting things up there. First of all, I’ve created a user for myself called ‘Cristian’ that is member of a group called ‘EC2ReadOnly’. This is the user that I will use to login to the AWS Console and the group is what will give it access.

We then need a user that the AD Connector can use to talk to the AD with. This is a plain user, not special permissions required.

users

We now have everything on the AD side. Before we create the connector, we must make sure that it will be able to talk to our DCs. The AD Connector will have IP addresses in your VPC. I’ve created the following Security Group that my Domain Controller is member of.

sg
Apart from RDP, this is what AWS states that the connector needs access to.

Now we can create the AD Connector. I’m using the small version which supports up to 500 users. If you have a larger AD you can choose the large one which supports up to 5000 users.

ds-conf-1

You can choose where in the network it should sit. I’m just using the default VPC for this demo.

ds-conf-2

After a few minutes it will be created. Now you can create the login page. Go in to to your AD Connector and create an access URL first. You can then enable the AWS Management Console.

Apps.png

You can then create the mapping between your Active Directory groups (or users) to IAM roles. This is how mine looks. It says AD group EC2ReadOnly maps to IAM role EC2ReadOnly

role-assigment


Putting it to work

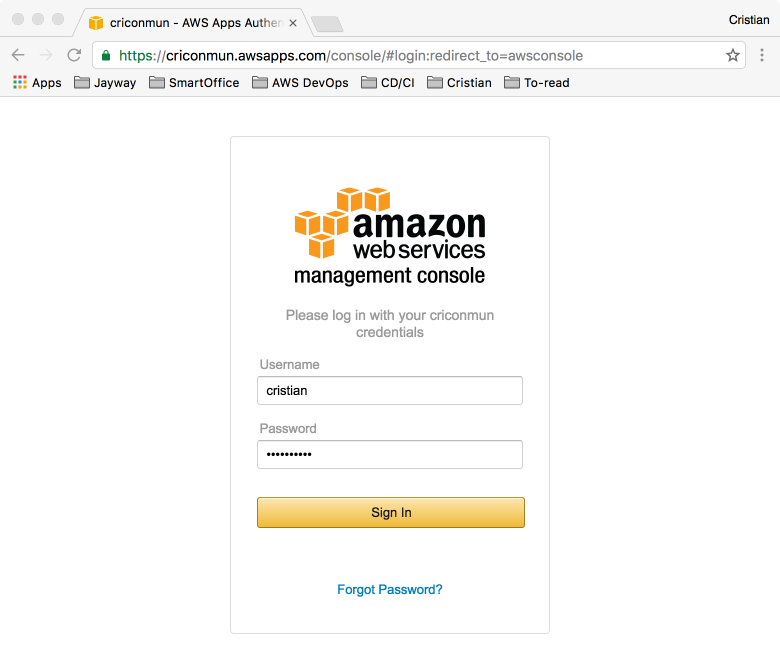
Go to the URL you chose, mine is called https://criconmun.awsapps.com/console, and you will get a login prompt. I’m logging in with my user called ‘Cristian’.

console-login

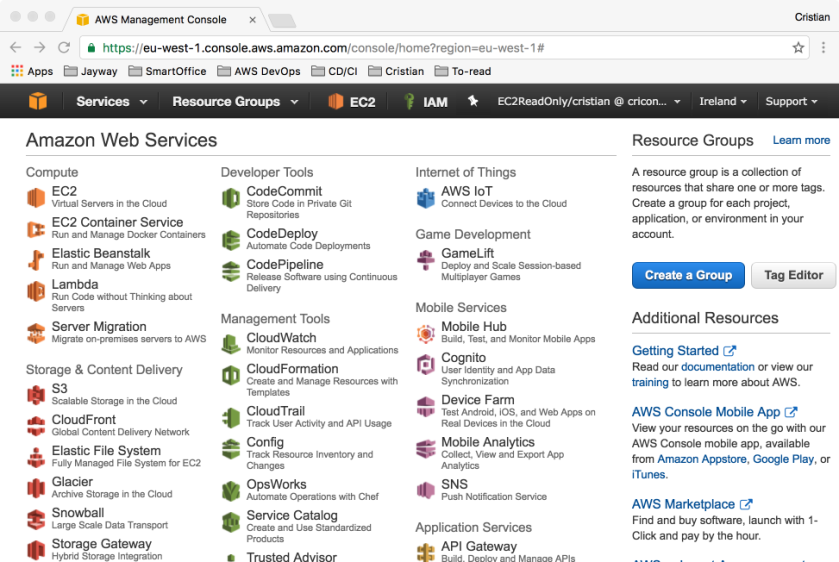
You will then be logged in to the AWS Console with the permissions of the role you specified in the AD to IAM role mapping. Note that it says EC2ReadOnly/cristian as the logged in user in the upper right hand corner.

console

Conclusion

AWS has made it really simple to set this up using the AD Connector. It didn’t take me more than 30 minutes in total. It is also quite affordable. A small connector supporting up to 500 users for around $40 per month. I think this is quite a reasonable solution for people that only occasionally log in to the AWS Console and maybe also with limited permissions.

Controlling EC2 instances with a button

The Minecraft button

I have a Minecraft server on AWS, but use it quite seldom. It doesn’t make sense to have it turned on constantly as you pay by the hour. On the other hand I don’t want to have to login to the AWS Console and sometimes the kids wants to play Minecraft when I’m not home. That’s where the idea with the Minecraft button came in – basically having a physical button to turn on and off the server.

The bits and pieces

Quite simple actually:

  • A Raspberry Pi
  • Green, yellow, red LED to indicate instance status
  • On/off switch
  • A Python script that checks the status of the server and lights the corresponding led
  • Another Python script that checks the button and sends API calls to AWS when pressed
  • AWS CLI and Boto3 for communication with AWS
20161106_132712
I made holes in the Raspberry Pi case and stuck everything there

Raspberry Pi

The Raspberry Pi runs Raspbian and is generation 1 model B, simply because that was what I had laying around. My gen 1 also has a roomier case than the gen 2 and 3 I have, which came handy to fit the cables, etc.

Electronic components

This is my shopping list. It links to a Swedish site but should give you and idea anyway.

Apart from that I use a 100 ohm resistor not to overload the LEDs.

The circuit looks like this.

curcuit

The stuff is fitted in the Raspberry Pi. Then just plugging in the cables to their corresponding pins. Check out the documentation on PIN numbering.

20161106_131712

AWS access

First of all, we need to create a user and assign it permissions.

Go to the  AWS console and navigate to IAM. Create a user, assign it the AmazonEC2FullAccess policy and create an access key that the Raspberry Pi will use to talk to AWS.

Install the AWS CLI which will allow us to configure credentials for accessing AWS.

sudo apt-get install awscli

Then run the following command and type in the access key you created and region where your EC2 instance is running.

aws configure

You also need to install Boto3 which is AWS’ SDK for Python. Just run a:

pip install boto3

The control script

The control script handles the button and begins with defining two functions

  • start_server – call AWS using Boto3 to start the server
  • stop_server – call AWS using Boto3 to stop the server

Then it just runs an endless loop and checks if the button is pressed every half a second. If it is pressed, it checks if the server is running and then calls the stop_server function, and the other way around. If the server is nog running or stopped, example in the middle of starting or stopping, then it does nothing.

#!/usr/bin/python
import boto3
import RPi.GPIO as GPIO
from datetime import datetime
from time import sleep


def start_server(server_id):
    print('Starting server {}'.format(server_id))
    instance = ec2.Instance(server_id)
    instance.start()

def stop_server(server_id):
    print('Stopping server {}'.format(server_id))
    instance = ec2.Instance(server_id)
    instance.stop()


pin = 17
GPIO.setmode(GPIO.BCM)
GPIO.setup(17, GPIO.IN, pull_up_down=GPIO.PUD_DOWN)

ec2 = boto3.resource('ec2')

while True:
    if GPIO.input(17):
        instance = ec2.Instance('i-dae58150')
        if instance.state['Name'] == 'stopped':
            print('{} - Starting server'.format(datetime.now()))
            instance.start()
        elif instance.state['Name'] == 'running':
            print('{} - Stopping server'.format(datetime.now()))
            instance.stop()
        else:
            print('{} - server is in unknown state, skipping'.format(datetime.now())) 
            sleep(1)
    sleep(0.5)

GPIO.cleanup()

The status script

This script handles the leds and makes a call to AWS, using Boto3, to check the status of the instance and updates the LEDs accordingly. This is done in an endless loop with a 1 second sleep for each iteration.

#!/usr/bin/python
import boto3
import RPi.GPIO as GPIO
from time import sleep

instance_id = 'i-dae58150'
red_pin = 27
green_pin = 22
yellow_pin = 10

GPIO.setmode(GPIO.BCM)
GPIO.setup(red_pin, GPIO.OUT)
GPIO.setup(green_pin, GPIO.OUT)
GPIO.setup(yellow_pin, GPIO.OUT)

ec2 = boto3.resource('ec2')

while True:
    instance = ec2.Instance(instance_id)
    state = instance.state['Name']
    if state == 'running':
        GPIO.output(red_pin, GPIO.LOW)
        GPIO.output(yellow_pin, GPIO.LOW)
        GPIO.output(green_pin, GPIO.HIGH)
    elif state == 'stopped':
        GPIO.output(red_pin, GPIO.HIGH)
        GPIO.output(yellow_pin, GPIO.LOW)
        GPIO.output(green_pin, GPIO.LOW)
    else:
        GPIO.output(red_pin, GPIO.LOW)
        GPIO.output(yellow_pin, GPIO.HIGH)
        GPIO.output(green_pin, GPIO.LOW)
    sleep(1)

Staring the scripts at boot

To make the scripts run automatically when you start the Pi, add the following lines to your crontab (run crontab -e)

@reboot nohup /home/pi/MinecraftButton/server_control.py &
@reboot nohup /home/pi/MinecraftButton/server_status.py &